How interior designers can turn 3D renders into presentation videos faster with AI
Learn how interior designers can turn quality 3D renders, blueprints, and material boards into useful presentation videos faster with AI tools.
7 minute read
A polished 3D render video can be built in professional tools with camera paths, lighting passes, animation, compositing, sound design, and post-production. But not every project needs a full production workflow. Especially when the time is the limiting factor.
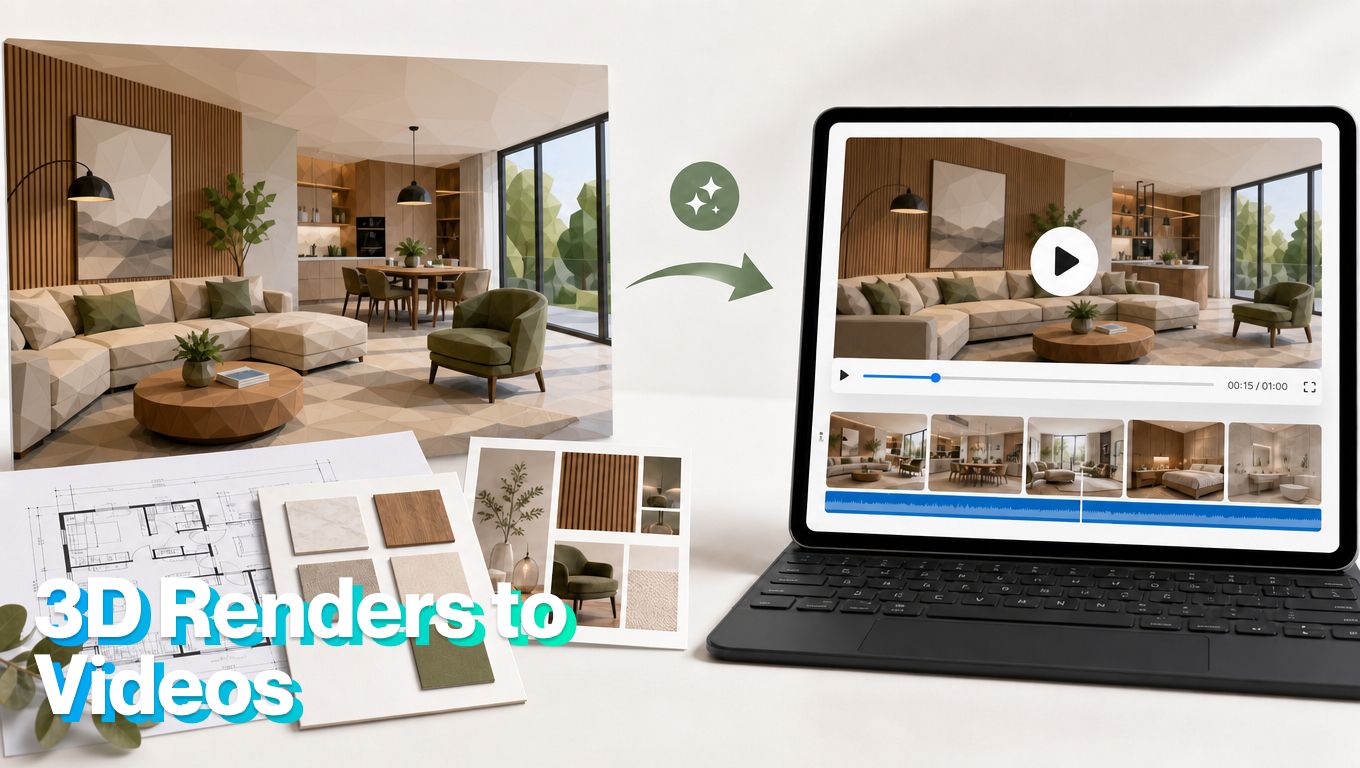
That is where AI video becomes useful. It helps interior designers turn existing assets into a short, polished presentation faster, without rebuilding the project inside a complex animation pipeline.
AI isn’t replacing high-end 3D video
If a designer needs full control over camera movement, exact lighting behavior, animated objects, construction sequencing, or photoreal cinematic walkthroughs, traditional 3D tools are still the stronger choice.
AI is better when the interior designer needs speed:
- A quick client concept preview
- A social media teaser
- A proposal video
- A portfolio clip
- A design-board animation
- A material palette presentation
- A before-and-after concept reveal
- A short render-to-video sequence for email or Instagram
In those cases, the value isn’t total control. The value is getting from static impression to usable presentation quickly.
When AI makes sense vs. when to use traditional 3D tools
AI is useful when the interior designer already has strong static assets and needs to turn them into a polished presentation quickly. Traditional 3D tools are better when the project requires exact control, technical accuracy, or full cinematic production.
| Use AI when | Use traditional 3D tools when | Why |
|---|---|---|
| You need a fast client concept preview | You need exact camera paths and full scene control | AI is better for speed; 3D tools are better for precision |
| You already have polished renders, plans, and material boards | The design is still being modeled or revised heavily | AI works best from strong finished assets |
| You need a short social teaser or proposal video | You need a cinematic walkthrough for a high-budget presentation | AI can package visuals quickly, but full 3D production gives more control |
| You want to turn a material board into a quick video sequence | You need animated objects, construction sequencing, or technical walkthroughs | AI helps with presentation flow, not detailed simulation |
| You need multiple versions for email, Instagram, a client deck, or a portfolio page | You need exact lighting behavior, reflections, shadows, or spatial movement | AI is strong for repurposing; 3D tools are stronger for technical realism |
| You want to explain mood, materials, and concept direction | The client needs to approve precise dimensions, joinery, or construction details | AI can support the story, but it should not replace technical documentation |
Why this works for interior designers who already have good renders
AI video works best when the source material is already strong.
If the render is weak, AI won’t magically fix the design. But if the render is clean, well-lit, and well-composed, AI can help create movement, pacing, transitions, and a presentation structure around it.
The AI value is in connecting quality pieces into a guided story.
Start with the assets you already have
The best workflow starts with organization. Before using AI, gather the design assets in the order you want the viewer to understand them:
- Concept board
- Floor plan or elevation
- Hero 3D render
- Top-down or axonometric view
- Material palette
- Fixture close-ups
- Detail studies
- Daylight render
- Evening render
- Final lifestyle image
This gives the AI a clear path. It also helps the designer avoid a common mistake: uploading random visuals and expecting the video to feel coherent.
The better the sequence, the better the output.
Where AI saves the most time
AI saves time in the parts of the workflow that usually slow interior designers down:
It can help create motion between still renders. It can turn a material board into a video sequence. It can generate social-friendly edits from existing visuals. It can add pacing, captions, and transitions. It can create multiple versions for different channels. It can help a designer avoid opening a complex editing or animation tool for every small presentation need.
The designer still has to check accuracy, labels, sequencing, and whether the result reflects the design intent.
How to create 3D renders into presentations using AI tools
AI tools like TensorPix Property Video Maker are built to turn listing photos, property details, 3D renders and other brand assets into real estate marketing videos faster than starting from a blank editing timeline.
1. Choose the presentation purpose
Start by deciding what the video needs to do. Is it for a client concept review, proposal, portfolio clip, social teaser, material presentation, or before-and-after reveal? A client review may need more explanation. A social teaser may need a stronger visual hook. A portfolio clip may need a more polished, atmospheric pace.
2. Organize the design assets
Gather the strongest visuals before creating the video. Useful assets include the hero render, floor plan, elevation, top-down view, material palette, fixture close-ups, furniture details, lighting variations, detail studies, and final lifestyle image. Put them in the order the viewer should understand them.
Login on the TensorPix platform.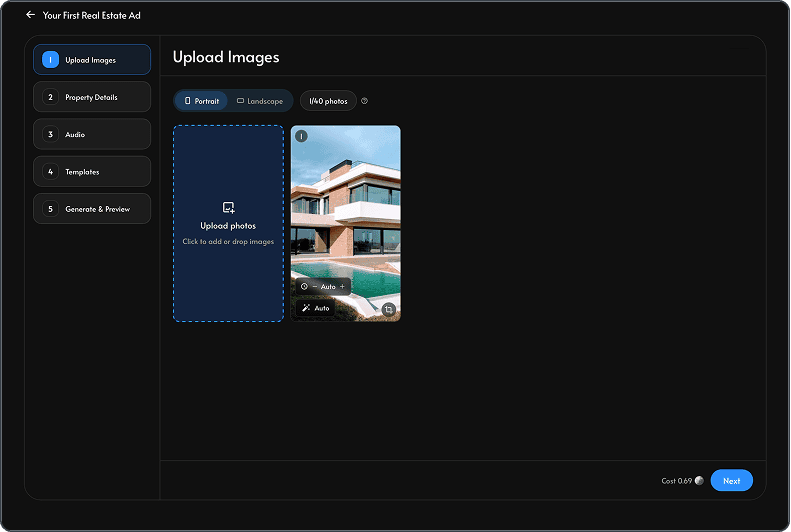
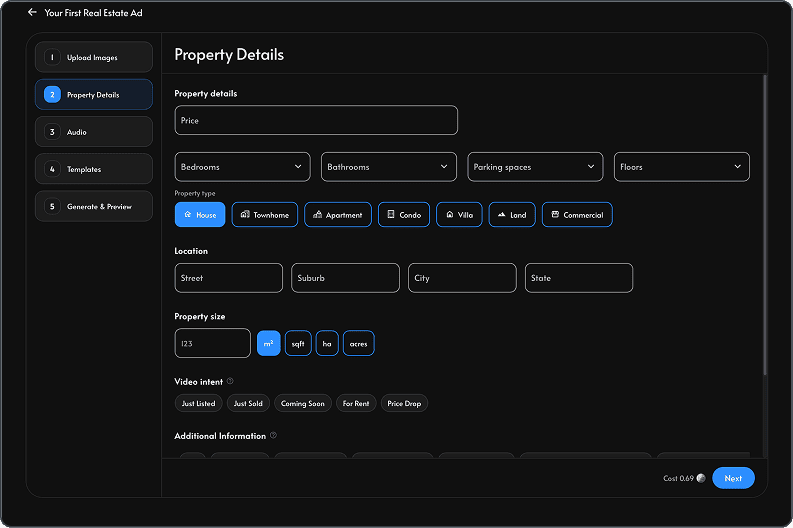
3. Add the project details
Keep the information clear and buyer-focused. Include location, property type, beds and baths, square footage, price, lot size, key updates, and the main reason the property stands out. This gives the video enough context to feel useful instead of generic.
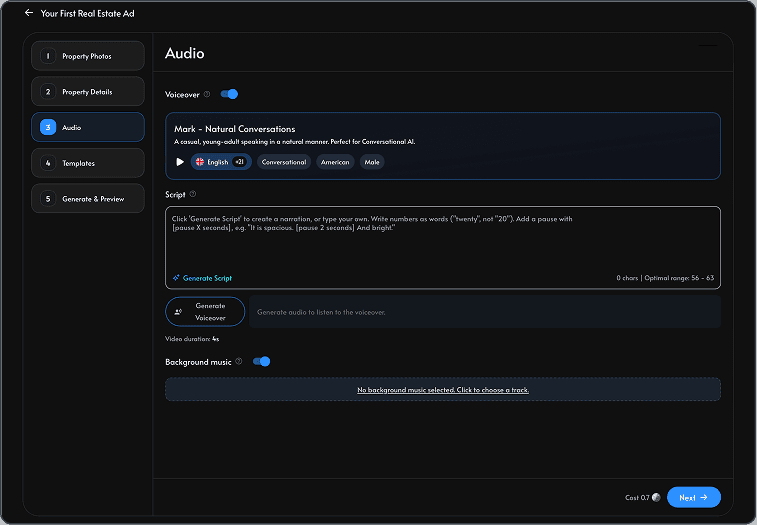
4. Generate the script or voiceover only when needed
If the video is for a client review or proposal, short narration can help explain the design intent, materials, and layout decisions. If the video is for social media or a portfolio, captions may be enough. Keep the language clear and client-friendly.
5. Select the template and music
Select a template, intro, outro, branding style, and music that match the design mood. A warm residential kitchen, minimalist apartment, luxury retail space, and boutique hotel concept should not all feel the same. The video style should support the design, not overpower it.
6. Review for accuracy
Before exporting, check every caption, room label, property detail, price, and claim. Make sure the video doesn't imply features the property doesn’t have. AI can create a strong first draft, but the agent still needs to review it like any other listing material.
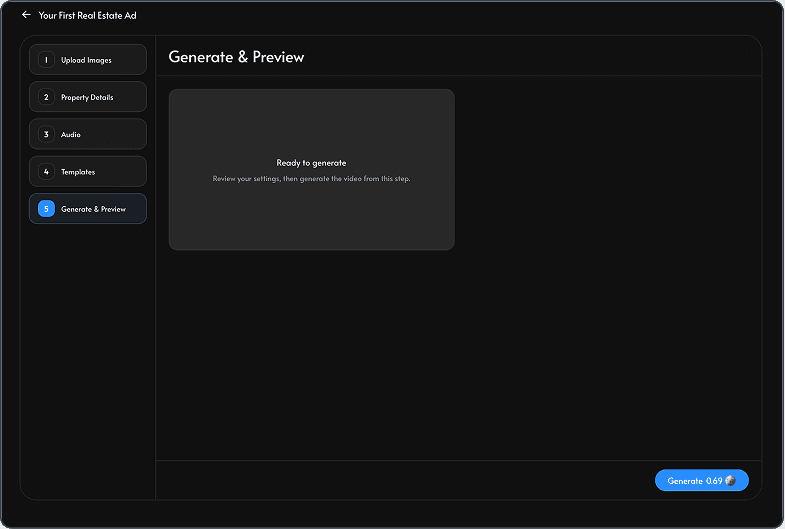
7. Generate your first video
Create the version that matches the channel. Use vertical versions for Instagram Reels, TikTok, YouTube Shorts, and social teasers. Use horizontal versions for client presentations, websites, portfolios, proposal decks, and email. If the project will be shared in multiple places, export more than one version.
Conclusion
If you already have quality renders, blueprints, material palettes, and detail studies, AI tools can help turn those static assets into a useful presentation video faster. The result isn’t meant to replace a full cinematic walkthrough. It is meant to help designers communicate the concept, show the materials, and create social-ready or client-ready videos without rebuilding everything from scratch.