AI video continuity: Generate consistent scenes without manual fixes
Learn how to achieve continuity in AI video generation. Discover why scenes break and how to create consistent, stitchable AI videos without manual fixes.
If you have ever tried to turn AI-generated clips into a real video, you already know the moment when things fall apart.
The first shot looks promising. The second still works. But when you come to the third, something feels off. And by the fifth, you are exporting frames, patching transitions, and fixing continuity manually. Literally chaos in video continuity.
The essence of the AI continuity problem
Most videographers would call this a continuity problem. It is usually described as:
- Characters drifting between shots
- Clips that refuse to stitch together
- Lighting changing without reason
- Videos that look fine individually but collapse as a sequence
Let’s rest assured that this is not a prompt failure, nor is it a lack of skill. And it is not because AI video is “not ready yet”. It is a workflow problem.
The reason lies in the fact that AI video generators are extremely good at producing isolated clips, at the same time, they are still sloppy when producing videos.
Why AI clips work, but AI videos don’t
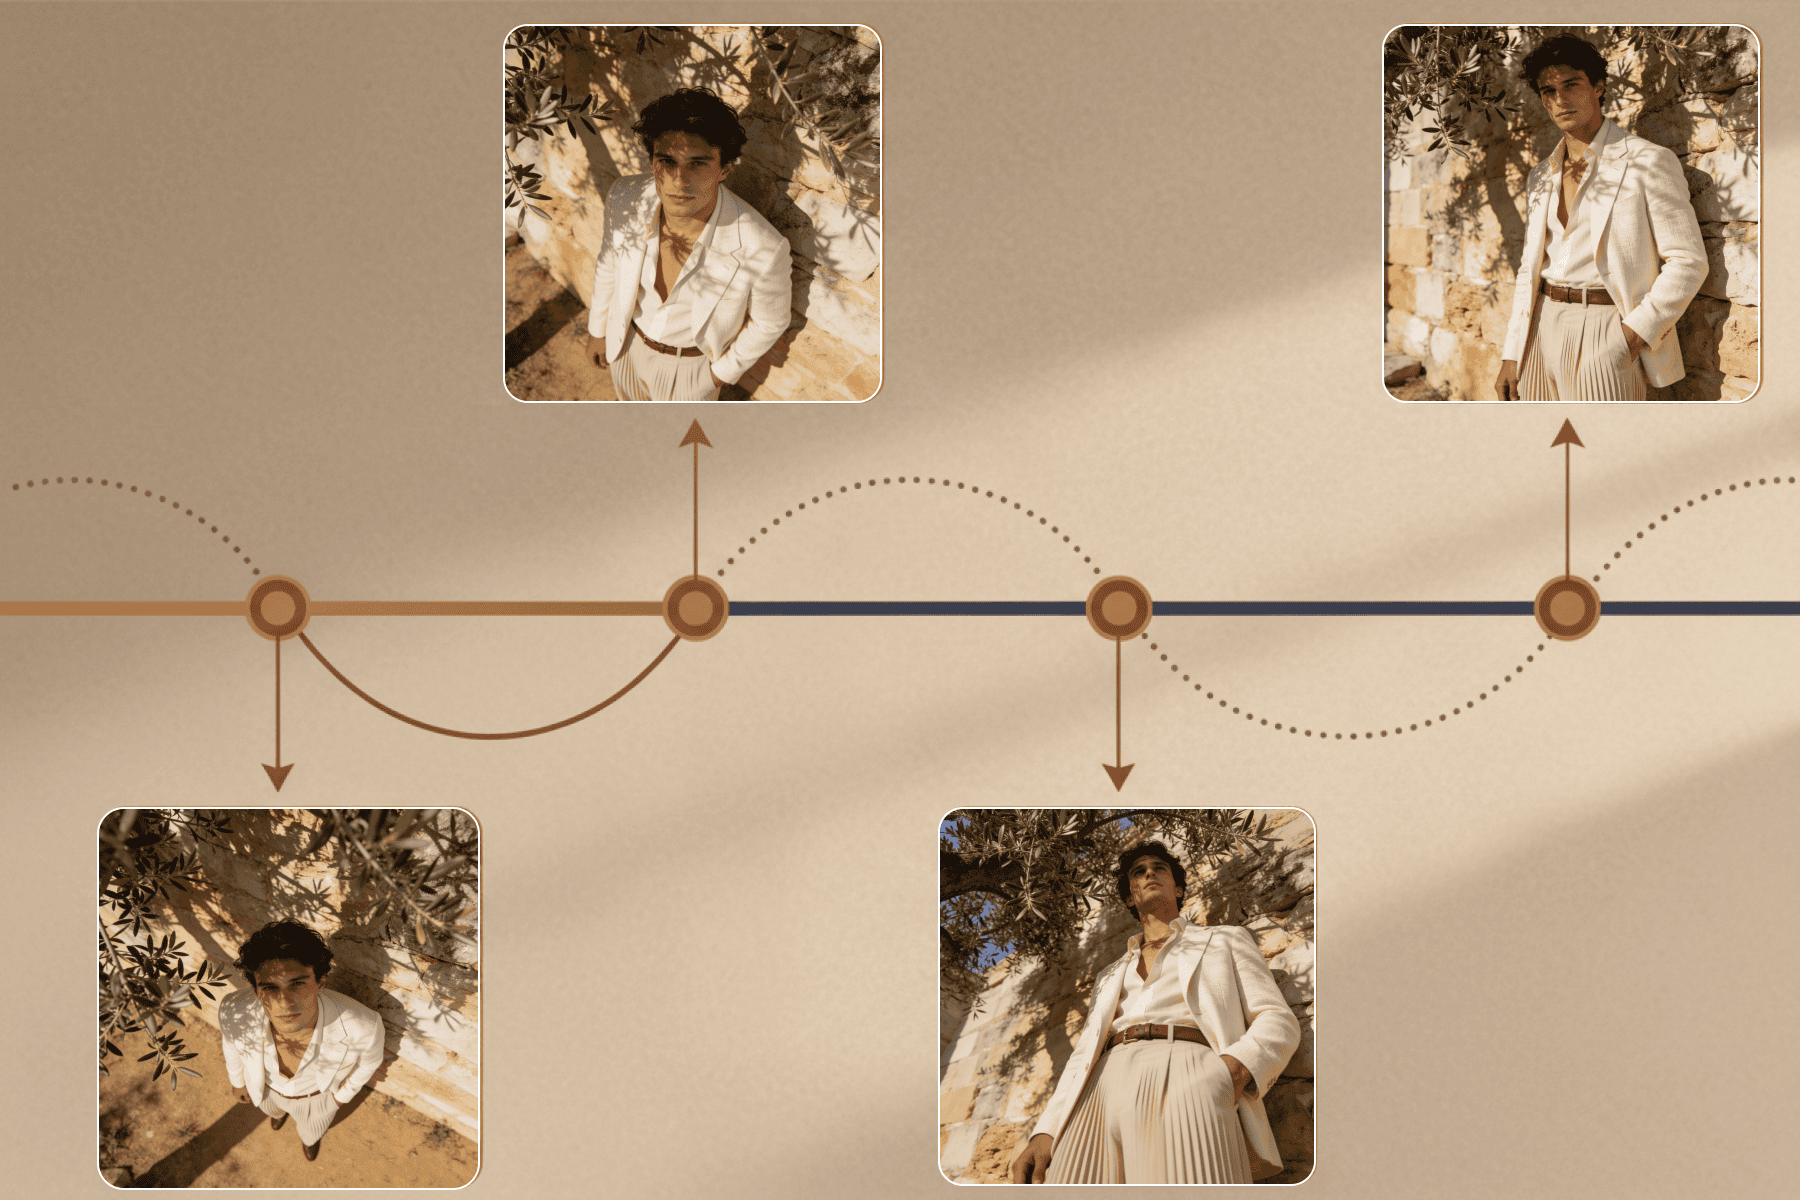
A single clip can hide a lot of issues. Slight identity changes, awkward lighting, or floating camera movement are easy to ignore when the clip stands alone. The moment you place that clip next to another one, every inconsistency becomes obvious.
Videos demand coherence over time. They require the viewer to believe that multiple shots belong to the same world, the same moment, and the same intent. Most AI tools are not built for that requirement. They are built to generate outputs, not sequences.
Why most AI video generators break continuity by design
The core issue is architectural. Most AI video tools treat every generation as a fresh request. Firstly, there is no persistent state, and secondly, no shared memory across shots.
When a tool claims consistency, it usually means one of three things:
- Reusing a prompt or re-prompting
- Applying a style preset
- Extending clip length
None of these address continuity. Especially the longer clips. They simply delay the moment when things start drifting. The tool is still reinventing the scene every time.
The four types of continuity that actually matter
When content creators say continuity is broken, they are usually referring to one or more of these layers.
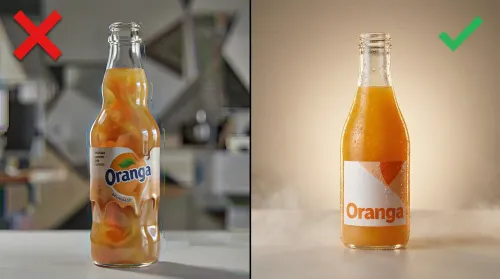
- Character continuity: Faces, proportions, clothing, or defining traits subtly change between shots.
- Temporal continuity: Frame-to-frame motion is unstable. Textures shimmer, edges wobble, and objects morph as time progresses.
- Camera and framing continuity: Perspective shifts without intent. Medium shots become wide shots. And the worst problem, camera movement resets between scenes.
- Lighting and style continuity: Exposure, color temperature, and highlights manifests inconsistency.
Most AI tools do not address these layers systematically, as they rely on chance alignment instead of structural control.
How TensorShots solves continuity problems
TensorShots approaches continuity as a system problem, not a feature toggle. This angle allows you to generate consistent scenes without manual fixes.
Instead of asking users to fight randomness with better prompts, it focuses on anchoring visuals early, keeping variables persistent across shots, and treating sequences as first-class objects rather than collections of clips.
This aligns naturally with real use cases as:
- Making ads for socials
- Making UGC videos
- Creating ecommerce content
- Generating multi-shot short-form video
These formats do not need spectacle. They need reliability.
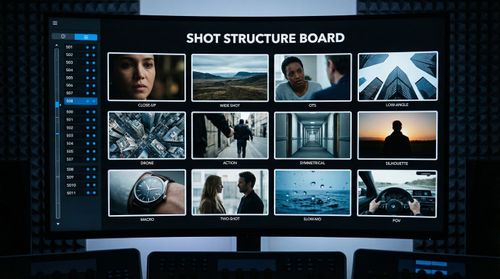
Generating consistent scenes with TensorShots
Here is how to use TensorShots AI-native video generator when looking to get consistent shots using image-first workflow which is essential to achieve good results.
Log on to the platform. From the menu select TensorShots by going to the Start now button.
- Start by clicking the New Project button, you will be directed to the onboarding panel where you initially setup your project.
- Within Project Description, provide more details about your project, product or service and its features, benefits and use cases.
- Provide details about the Target Audience.
- Select duration of the video clip you want to generate, following format selection between the most common ones (i.e., vertical, square, portrait or widescreen).
- Add a reference image that captures the theme of your project in the best possible way.
- Optionally, you can add brand guidelines (i.e., tone, style, colors and other features from the brandbook), and some extra description if necessary. Hit Create Hook button.
- Select Hook, which will be later on guiding your video towards AI native video creation. Also you may choose between different voiceovers available in the menu next to the hook selection. Once done, go to the **Script **making section.
- Choose from the given Voiceover scripts, or ask TensorShots to generate more. Of course, you can edit the generated scripts until you are satisfied with the outcome. Go to Create Storyboard.
- This is where you can add, crop or change frames of your videos. Each shot is completely customizable, and you can change the camera angle, objects, lighting, background. Before creating a video for the shot, start with selecting the first and optionally last frames of the video. It helps you to envision how the beginning and ending of the static video frames will look rather than directly going into video generation.
- When the storyboard and shots meet your expectations, proceed to the Export button. You can optionally add background music and adjust audio levels, then use the quick preview to review the full sequence. Once everything looks correct, export the final cut and allow TensorShots to render the video in the selected format and duration.