How to shoot a real estate listing on iPhone and turn it into a video presentation
Learn how to shoot a real estate listing on iPhone, prepare the best photos, and use TensorPix Property Video Maker to turn listing assets into videos.
7 minute read
You don’t need a full production setup to create useful real estate listing media. A modern iPhone can capture strong property photos if you shoot with discipline, prepare the home properly, and understand what buyers need to see.
The goal isn’t to pretend an iPhone replaces a professional photographer on every listing. It doesn’t. Luxury homes, complex lighting, large estates, twilight shoots, and premium campaigns still benefit from professional media.
When iPhone is enough and when to hire a pro
An iPhone can be a practical choice when the listing needs speed, simple visuals, or social-first content. Professional media is still the better choice when the property needs premium presentation, advanced lighting, drone footage, or a more polished campaign.
Use iPhone when:
- You need quick photos for a rental, coming-soon post, or fast listing update.
- The property is clean, simple, and easy to photograph.
- You are creating social clips, open house reminders, or short listing teasers.
- The listing already has professional photos, but you need extra vertical content.
- The goal is speed, not a luxury-level presentation.
Hire a professional when:
- The home is luxury, architectural, waterfront, or high-value.
- The property has difficult lighting, large windows, dark rooms, or mixed light.
- You need twilight photos, drone footage, floor plans, or a full listing video.
- The home is large, staged, or has several outdoor areas and amenities.
- The campaign needs to support a premium price point or seller presentation.
A simple rule works well: use an iPhone when speed and practicality matter most. Hire a pro when presentation quality can affect buyer perception or seller trust.
Start with the property, not the camera
Good iPhone real estate photography starts before you open the camera.
Clean the home first. Clear countertops, hide cords, remove trash bins, open blinds, replace burned-out bulbs, straighten furniture, and remove personal clutter. Your phone will capture whatever is in front of it. AI video tools will then reuse those same visuals. If the room looks messy in the photo, it will look messy in the video too.
To keep shoot focused, walk through the property before shooting. Decide what each room needs to prove. The kitchen may need to show counter space. The living room may need to show flow. The backyard may need to show privacy. The primary bedroom may need to show scale.
Use the right iPhone settings
It sounds basic, but a smudged lens can make every room look soft or hazy, so clean it first.
Turn on the grid so vertical lines are easier to keep straight. In real estate, crooked walls and tilted door frames make photos feel amateur even when the room is attractive.
Use the standard lens for most rooms. On many iPhones, the ultra-wide lens can make small spaces look distorted. It is useful in tight bathrooms or narrow rooms, but use it carefully. If cabinets, doors, or walls start bending at the edges, step back and use the standard lens instead.
Avoid heavy filters. Real estate photos should look clean and accurate.
Tap to focus and adjust exposure before taking the shot. If windows are too bright, lower exposure slightly. If a room is dark, brighten it without washing out the image.
Shoot from the right height
Lousy real estate photos are taken too high, too low, or too fast.
For interiors, hold the phone around chest height. Keep it level. Don’t tilt up or down unless there is a specific reason, such as showing a tall ceiling, staircase, or light fixture.
Shoot from corners and doorways when possible. This helps buyers understand the size and layout of the room. Avoid standing in the middle of the room unless you are capturing a detailed shot.
For each important room, capture:
- One wide shot from the best corner
- One second angle that shows flow into the next room
- One detail shot if the room has a standout feature
In short, a video made from a planned shot list will feel intentional.
Use light carefully
Natural light helps, but direct sunlight can create harsh shadows and blown-out windows.
The best time to shoot most interiors is when the home is bright but not hit by severe direct sun. Open blinds and curtains. Turn on lights if they improve warmth, but watch for mixed color temperatures. Some rooms look strange when daylight and yellow bulbs fight each other.
If a window view matters, take an extra photo exposed for the view. If the room matters more, expose the room. Don’t rely on one photo to do everything. For exterior photos, avoid harsh midday light when possible. Morning or late afternoon usually gives softer results.
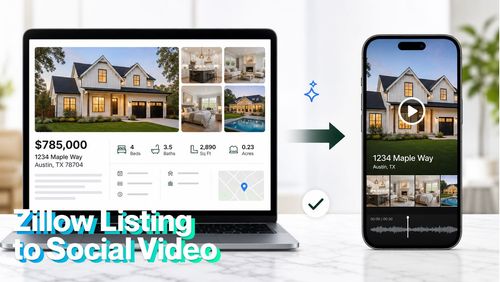
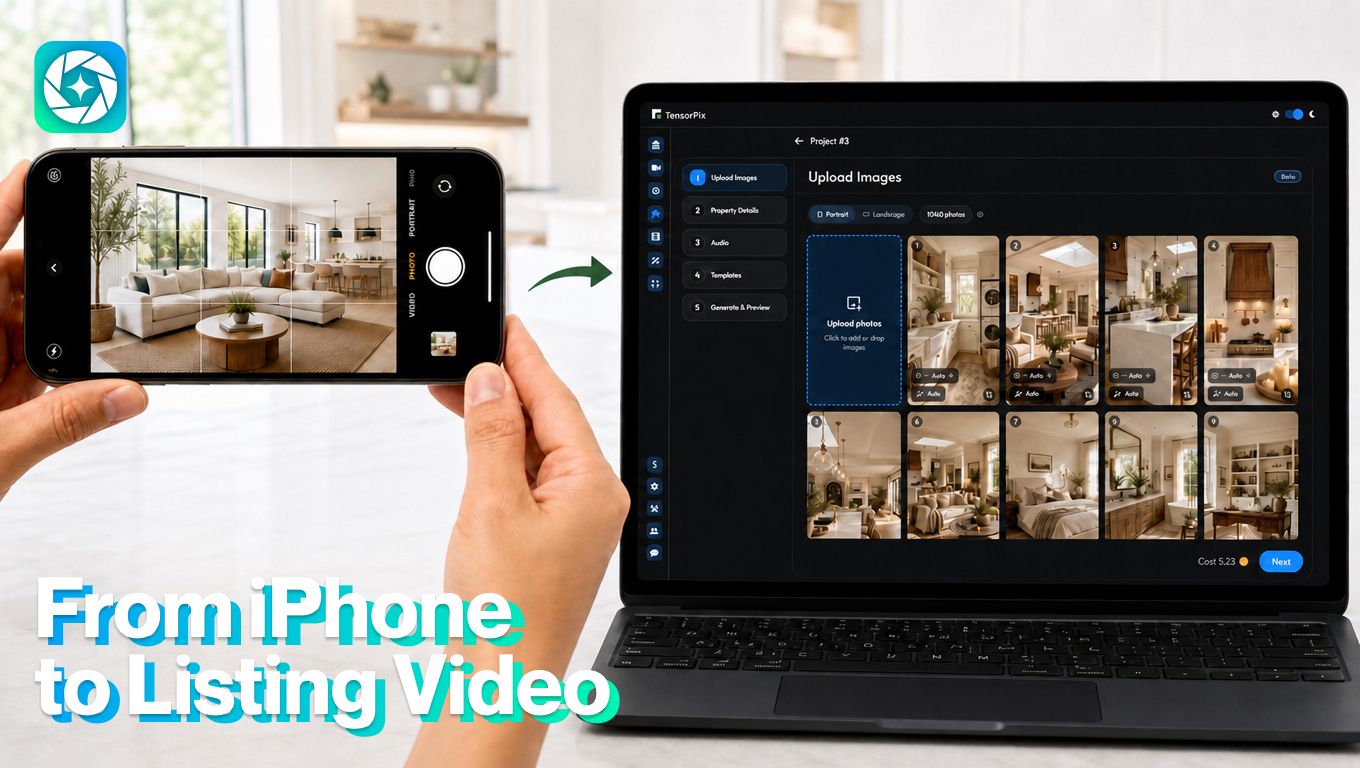
How to turn iPhone photos into a real estate video with TensorPix Property Video Maker
TensorPix Property Video Maker is built to turn listing photos, property details, and brand assets into real estate marketing videos faster than starting from a blank editing timeline.
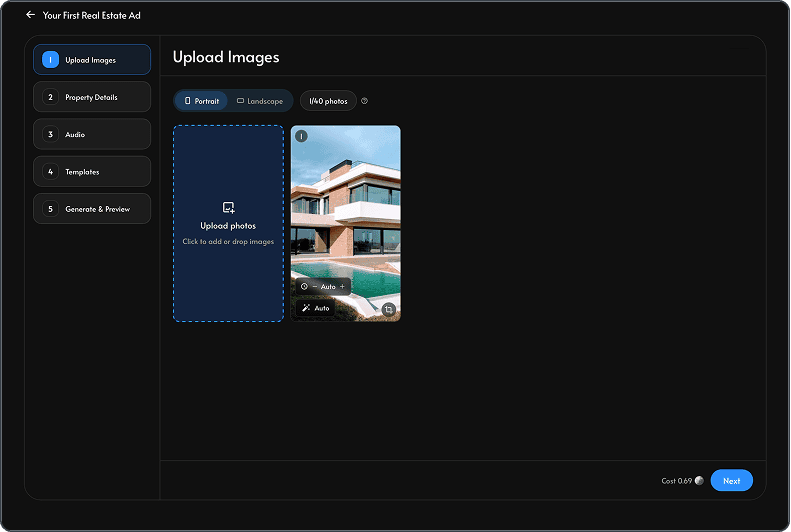
1. Prepare property photos
Choose the best looking listing photos on your iPhone before you start. Decide what kind of video you need before building it. Vertical works best for Instagram Reels, TikTok, YouTube Shorts, and Facebook Reels. Horizontal works better for YouTube, property pages, listing presentations, and email.
Login on the TensorPix platform. Add the best photos first so the video starts with the strongest visual story. Put the most important images early: exterior, main living area, kitchen, outdoor space, or view. Avoid uploading weak, dark, cluttered, or repetitive photos.
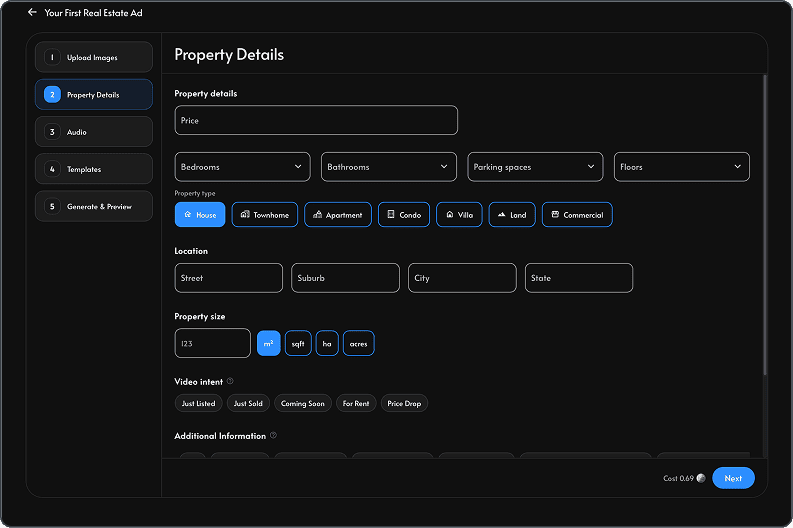
2. Add the property details
Keep the information clear and buyer-focused. Include location, property type, beds and baths, square footage, price, lot size, key updates, and the main reason the property stands out. This gives the video enough context to feel useful instead of generic.
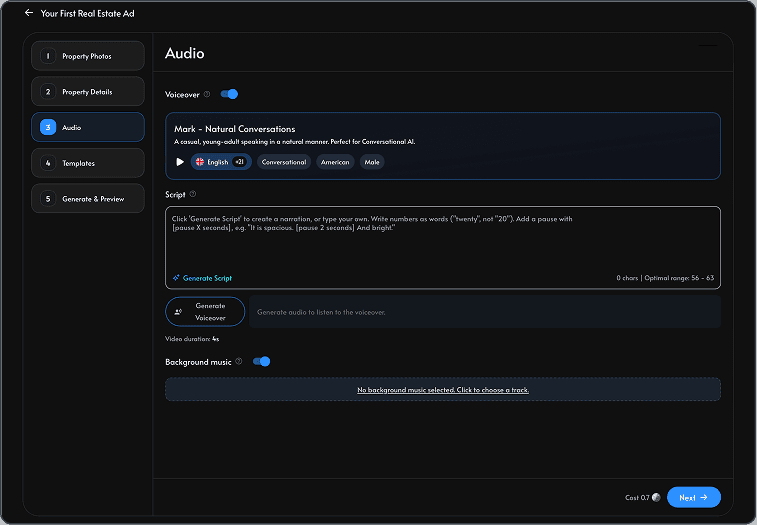
3. Generate the script or voiceover
Use the script field to guide the narration. Focus on what buyers should understand: layout, flow, outdoor space, upgrades, neighborhood fit, open house timing, or the reason the listing is worth seeing. If you use AI voiceover, review the script before generating the final version so it sounds natural and accurate.
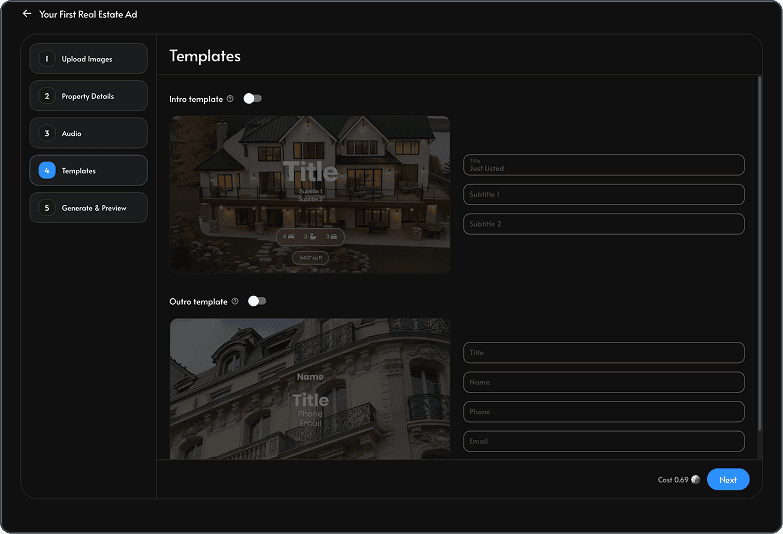
4. Select the template and music
Choose an intro, outro, branding style, and music theme that match the property. A luxury home, family home, rental, and open house reminder shouldn’t all use the same tone. Keep the design polished, but let the listing remain the focus.
5. Review for accuracy
Before exporting, check every caption, room label, property detail, price, and claim. Make sure the video doesn't imply features the property doesn’t have. AI can create a strong first draft, but the agent still needs to review it like any other listing material.
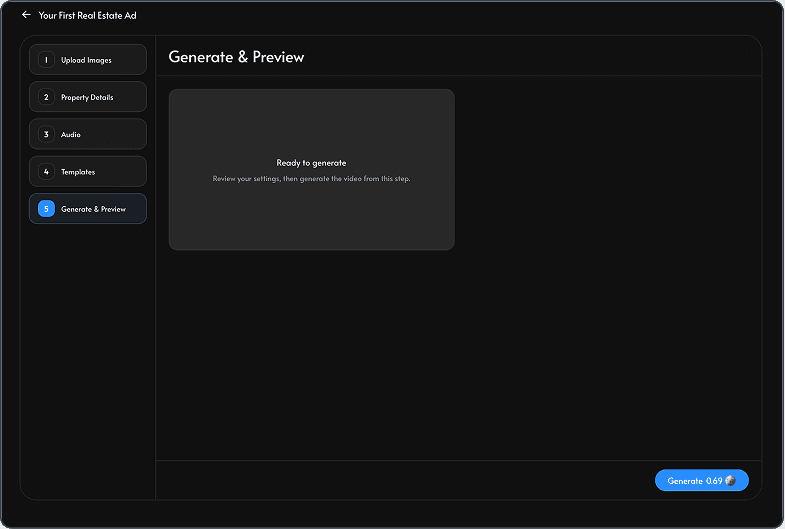
6. Generate your first video
Create the version that matches the channel. If the listing will be promoted in several places, generate more than one version and download it once satisfied with the final outcome.
Final takeaway
Shooting a real estate listing on an iPhone can work if you prepare the home, use clean composition, shoot from the right height, capture a complete shot list, and think ahead about video.
The best results come when both parts work together: good iPhone photos first, smart AI video creation second.